I'm around and round we go
Moderator
Apr 19, 2006 17:12:40 GMT -5
Pretty easy tutorial, but I found it as a nice effect that I use often, so I'd thought I'd share it ^^
WELCOME to the tutorial on how to make a scattered color effect! First off, this tutorial was made in PSP X, but I'm sure it's capable with 9, 8, and 7...possibly earlier. Only layers, coloring, and erasing involved.
STEP 1: Open your image I'm going to use this image:
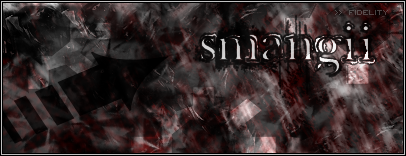
But, I'm going to erase the color by going to Adjust --> Hue and Saturation --> Hue/Saturation/Lightness and setting the saturation bar to -100 (or lowering it all the way down) Now my image is grayscaled...

STEP 2: Go to layers --> New raster layer --> OK
STEP 3: In the Materials Palette, click on your foreground color and set it to: ff8080
STEP 4: Press the "F" key on your keybaord, or click the Flood Fill tool on your tool bar (the paint bucket).
Fill the new raster layer. Your entire image should be the pink/salmon color.
STEP 5: press the "X" key on your keyboard. This should open the eraser tool. In the eraser toolbar, select your brush type. I'm going to use this Tank Drawings set that can be downloaded
HERE. Or, if you don't know the whole downloading process you can use the
Marble2 brush in PSP X or some other type of grunge-like brush.
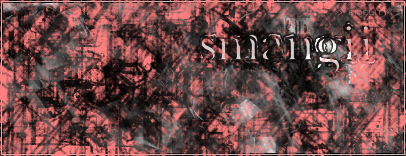
STEP 6: Begin to erase your image, with SINGLE CLICKS. Do NOT drag your cursor around, and do not erease the entire thing! Here is what your erased image should look like:
STEP 7: With the layers palette opened, double click on your pink-colored raster. (the new one)
STEP 8: A "Layer Properties" Window should open up. Click the drop-down arrow under "Blend Mode" and choose "Color" Like so:

Click OK.
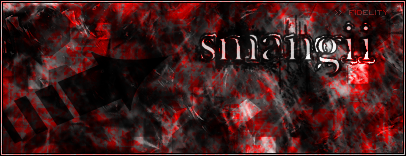
STEP 9: Ta da! That's the easy blood splattered effect ^^ Here's what mine looked like:
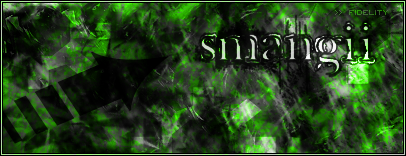
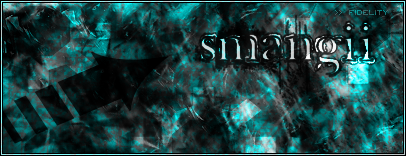
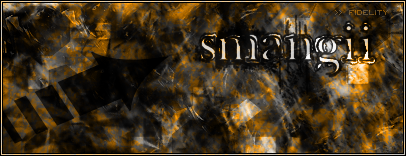
Now, if you would like it another color, go to Adjust --> Hue and Saturation --> Hue/Saturation/Lightness. Set your Saturation to 0, and your lightness to 0. For the Hue, drag the cursor up and down the bar to select a color you like. Here are a few that I made:
HUE AT 105:
HUE AT 180:
HUE AT 36:
Hope you enjoyed!

Apr 19, 2006 21:09:52 GMT -5
Very Nice Smangii! Excellent Work!
I'm around and round we go
OP
Moderator
Apr 19, 2006 21:40:09 GMT -5
Thanks, Angel ^^ I use this effect a lot for coloring, works out pretty well if you do multi colors, too
I'm around and round we go
OP
Moderator
Apr 20, 2006 6:58:48 GMT -5
O.o...they work for me...
Apr 20, 2006 15:06:48 GMT -5
Yeah, i see them fine. Something seems to be up with your computer, AoraX
Apr 20, 2006 19:15:08 GMT -5
Ooo nice tut! I like that effect

gonna go test it out
I'm around and round we go
OP
Moderator
Apr 20, 2006 23:45:58 GMT -5
Thanks, xoa! Show me what you make!!
Apr 21, 2006 22:29:27 GMT -5
YEAAAHHHH This technique is awesome...lookie what i made with my album:
FIRST RESULT:

SECOND RESULT:

THIRD RESULT:

Apr 21, 2006 23:12:42 GMT -5
Awesome tutorial, Smangii. And Platinum, that 3rd result pwns....pure awesome. It looks like real stains, the color and everything.
I'm around and round we go
OP
Moderator
Apr 22, 2006 11:44:24 GMT -5
Woah, nice effect on that album, Platinum.
Apr 22, 2006 12:07:38 GMT -5
SWEET. Period. I'm gonna use this effect more often

Apr 22, 2006 22:41:10 GMT -5
Why zanks, Bryte, Smangii, and Haffy ^^ It is a sweet effect, no? I like #3 the best too
Apr 18, 2009 21:28:11 GMT -5
Awesome tutorial, though, all my "works of art" were horrible. I don't know, that might be normal though.


 gonna go test it out


