Aug 17, 2011 13:25:34 GMT -5
In this tutorial I'm going to show you how to make a scan bar on your signatures.
Open photoshop and your signature you want the scroll bar on. When you image is open click on your marque tool, then click CRTL A then CTRL C. Next close your image and click file new OK. Then click CRTL V. This is so it's in the right format.
Preview of my image:

Next click new and make the width: 30 pixels and height: the height of the signature you want it on.
Now click on the marque tool again and click CTRL A. Now click on the paint bucket tool. Then go to your pallet and change the colour to white or black. Then fill it with the colour you have chosen.
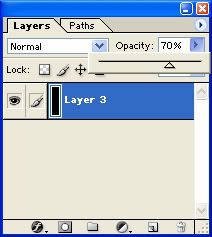
Now change you opacity to about 70%.
Black preview:
Then click new layer.
Click on marque, then CTRL A and right click on your image and select stroke.
Stroke Preview:

Change the size to the size of you boarder.
Then go layers, merge visible.
Click the marque tool again and CTRL A then CTRL C.
Now close that image and paste it on you signature one that is still open.
Next click on window and animation. This should open the animation window.
Now its opened the animation window make sure your scan bar image is at the far left side of your image.
Now click on a new animation layer. Select that layer and move the scan bar to the far right side.
Select the first animation layer and click the tween button.
Tween Button Preview:

Then put in these settings:
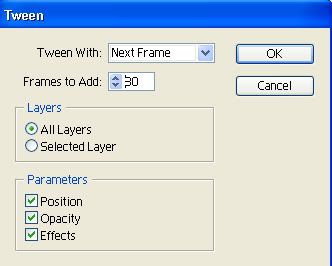
The Number is 80
Now when you have clicked OK.
You have to select the last image and create a new animation layer. Now click on the new layer and drag the scan bar to the left side of the page. Next click on the animation layer before the last one. Then click tween and put in the same settings these:
The Number is 80
Click OK its done now go file, save optimized as. Now put in the name and set the type as gif.
Enjoy.

Post here for support.

Aug 18, 2011 19:44:14 GMT -5
I'm a bit unsure as to what this tutorial is supposed to achieve?